- Overview
- Installing Theme and Plugins
- Demo Content Installation
- Getting Started
- Theme Options
- Sidebars / Widgets
- Setting the slider
- Setting the pages
- Setting the Blog
- Setting the Portfolio
- Setting the Team Members
- Setting the Testimonials
- Setting the Client's Logo
- One-page site
- Visual Composer
- Elementor
- Setting WPML Multi-Lanuage
- Translation
- Shortcodes
- FAQ
- Sources / Credits
Translating your website
Translation overview
If you are new to translating WordPress, you’re in the right place! In general, internationalization and localization (commonly abbreviated as i18n and l10n respectively) are terms used to describe the effort to make WordPress available in languages other than English for people from different locales. The actual localization is done using the GNU gettext framework, which is used by WordPress itself including the themes and plugins.
Here are overview steps for translating your site.
- Set your WordPress for the language so the admin section will be in your language
- Create language PO file for translation
- Modify the PO file using POEdit software and translate all strings in it. This will also generate MO file which is used by WordPress
1. Set your WordPress for the language
In order to make WordPress recognize the language to which you want to translate the core WordPress, the theme or the plugins, you have to define the language within the wp-config.php file or change a setting within the dashboard. The process is dependent on the WordPress version and is described below:
For WordPress 3.9 and older versions
To Translate WordPress, Follow These Steps.
Step 1 – Login to your FTP account and edit the wp-config.php file.
Step 2 – In the wp-config.php file, look for WPLANG constant which looks like:
define('WPLANG', '');
Step 3 – Define the WPLANG constructor by adding the ISO Language code of your language. The names consist of locals, a combination of language and regional dialect. For example, if you were translating to Deutsch language, change the WPLANG constant to look like the following code:
define('WPLANG', 'de_DE');
For WordPress 4.0 and newer versions
To Translate WordPress, Follow These Steps.
Step 1 – Login to your WordPress admin section.
Step 2 – Than go to Settings > General section and change language from the Site Language dropdown.
Step 3 – Save the settings and done.
2. Create language PO file
Storing translation files in the right directory is very important to make sure the translations you’ve downloaded, created or edited remains functional and intact. There are two ways to store translation files. The first method is storing it inside the themes folder located at the wp-content/languages/themes folder, and the second method is to create a new folder inside wp-content named anomica-languages (this is for safety).
Translation files
We are providing translation files so you can translate your site easily. Just follow the steps given below:
- First you need the PO file to edit it and add your translation in it. We are providing anomica.pot file in our theme folder so you can find it at
/wp-content/themes/anomica/languages/folder. the file name is anomica.pot. You can create PO file from this POT file and add your translations to PO file
Method 1: Storing Inside The /wp-content/languages/themes Folder (recommended)
Generally language files are in the themes folder (that is 3rd method) and you put inside it. But the theme update will remove the language files so we recommend you to put your files outside of the theme folder.
Placing your translation files inside /wp-content/languages/themes folder will make your language files safe and it will not be removed on update. So updating the theme will not overwrite the wp-content folder. Storing your translation files here will ensure they stay intact during updates.
If you choose to store your language files using this method, remember that the file structure is different, and must include the theme name, as well. For example, if the language files are in the Deutsch language, the file names would be anomica-de_DE.mo and anomica-de_DE.po.
Method 2: Storing Inside The /wp-content/anomica-languages/ Folder (for safety)
Generally language files are in the themes folder (that is 3rd method that we don't recommend so we haven't described it) and you put inside it. But the theme update will remove the language files so we recommend you to put your files outside of the theme folder.
Placing your translation files inside /wp-content/anomica-languages/ folder will make your language files safe and it will not be removed on update. So updating the theme will not overwrite the wp-content folder. Storing your translation files here will ensure they stay intact during updates.
In order for WordPress to recognize the language to which you want to translate the theme, you must name the Language files accordingly using the ISO Language Codes. For example, if you wanted to translate anomica to the Deutsch language, the filenames would be de_DE.po and de_DE.mo.
3. Modify the PO file using "POEdit" software
There are different editors out there for the purpose of editing .po files, but POEdit is easy to use, it is available for all platforms and it is freeware. To download POEdit, follow this link.
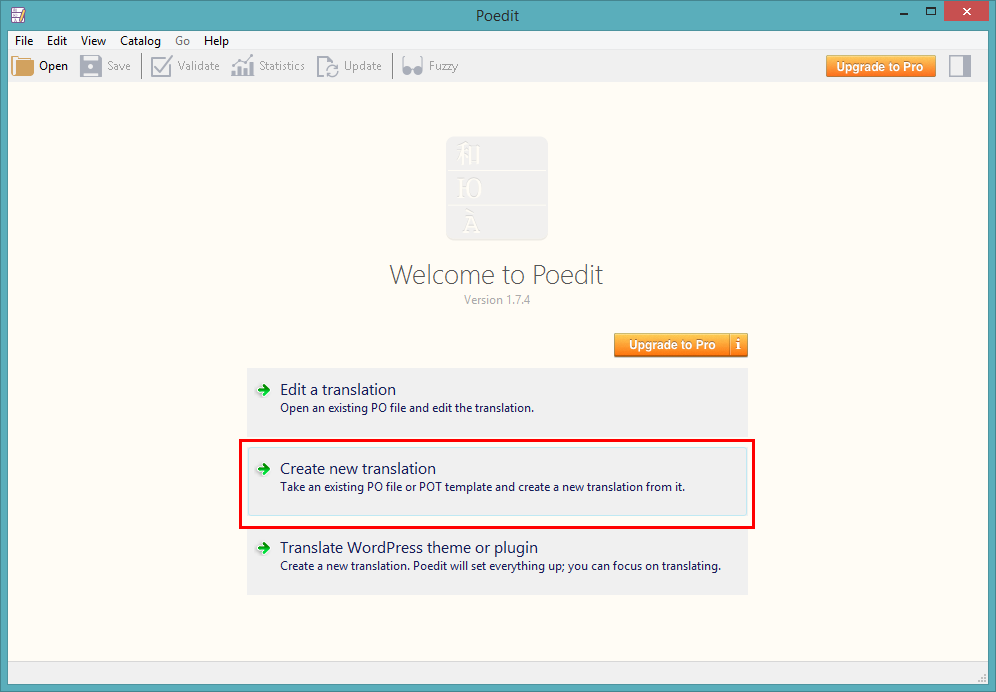
For example, just open the recently saved de_DE.po or zippco-de_DE.po (depends on which step you are following) in this POEdit software and start editing it. Add translated word and save the changes.